Summary:
Conversion - Nintendo Classic
Players - 1 or 2 co-op
Type - Strategy
Stages - ??
Monitor - Raster, Standard Res, Horizontal, Inverted Color, Amp
Sound - On Board with Amp on Monitor
Inputs - start, 2-way Joystick, 1 button
Year - 1983
Made by - Nintendo
Description:
I'll type it as soon as I get to play it!
Technical:
 |
The game came in a dedicated wide body cabinet and a Nintendo-Pak conversion kit for Donkey Kong, Donkey Kong Jr. and Popeye games. The dedicated version has a control panel, bezel, and marquee that are about two inches longer than in the conversion kits so be sure to know which you need when order parts. The game also operates on a 100 volt system which can make it very annoying when you are looking for a monitor and marquee light. The original type of monitor this and other early Nintendo games use is a 19 Sanyo EZV-20 but some later models used a Sharp monitor. These are unique because they run on 100 volts, display the inverted video of the Nintendo games, and also have an audio amp built into it. They usually have an inverter board that converts the video signal of normal boards but it is not needed for Nintendo games. Also note that the Popeye power supply will not work for the Mario Bros game. I attempted to build an adaptor in order to test this game in one of my other cabs from some parts I ordered of JammaBoards.com but there is sync problem. I haven't figured out if it is my wiring, the board, or something the board should do on a normal monitor.
About My Game:
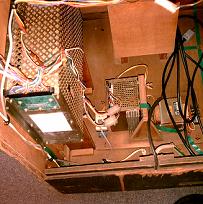
I bought this game in May 2005 at Marys Swap Meet in Spencer, OK as a project game. It is a dedicated wide body cabinet. The game was in real bad shape and even after some repairs it still does not work. I had to clean a quarter inch of dust off of it and remove a mouse nest from the marquee area. The monitor is not working and I am looking for a replacement. The marquee, bezel, and control panel are in great shape. The cabinet itself though is in rough shape, especially the back of it. One other problem with it is it does not have a back door. I have finally started working on the cabinet restoration. I have the original owners manual for this game but it is the Nintendo-Pak version.
Repair Log:
06-??-05
Over a week I completely disassembled game and cleaned all components. I managed to get it all back together but not tested because I still lacked a .300ma 100V fuse for the monitor. All wires and switches were tested for continuity and all were ok.
12-??-05
Tested the game for the first time. Voltages looked ok so I tried to replace the fuse with a .325 240V fuse but some of the resistors on the monitor began smoking. Apparently the fuse problem is associated with a bad flyback transformer.
11-18-06
Built a Jamma harness with parts I received from Jammaboards.com and tested the pbc board in my ESWAT cab. The game displayed a sync problem.
12-18-06
Touched up some of the soldier joints on the Jamma harness I made.
01-03-07
Tested the pcb game again in my ESWAT cab and this time I got garbage on the screen. I guess this is an improvement!?!
05-08-07
Purchased new Sanyo EZV-20 monitor from Metro Pinball and Video and re-caped monitor. Had a wave in the photo when I purchased it but the Zasen cap kit that I purchased with it did not fix it.
05-11-07
After posting on the KLOV help board I swapped the filter cap with the one from the old monitor and it seemed to fix the problem. I will still need to buy a new one from Bob Roberts.
05-17-07
Played around with the adjustments I found out that the green pot on the inverter board was faulty and will need to be replaced. The inverter board on the old monitor was tested and also showed problems.
05-24-07
Tested pcb with audio after still having a problem with the cpu chips and the screen changed from random garbage to all 0 after about 7 minutes.
05-27-07
Removed everything possible from the cabinet to begin cabinet restoration.
05-28-07
Removed damaged portions of plywood and purchased Bondo to repair the cabinet.
05-30-07
Removed all of damaged wood along back and bottom and replaced it with a strip of wood 1.75x.25 purchased from Home Depot.
05-31-07
Cut new back door and door support.
06-02-07
Used Goof Off to remove sticker glue and started Bondo on right side of cabinet.
06-03-07
Finished Bondo work on right side of cabinet.
06-05-07
Worked on the front, left and back sides of the cabinet.
06-07-07
Sanded second application of Bondo on the front, left, top, and back sides and removed the speaker support for better access. I also installed the back door support with nails and wood glue.